M19 Tutorial
Log in for wiki controls
What this is
The following page is a short introduction to Therion using the following workflow:
- Survey the cave with Android Phone running the 'Topodroid App' (this was done on July 2018)
- Export the recorded data to .th (centreline) and .th2 (drawings) format
- Neaten up the survey in Xtherion
- Produce plan and extended elevation pdf
Getting started
The tutorial files are available for download [here](). You will find the folder tutorial containing a series of files.
The following files should be listed: M19.th, M19-1p.th2and M1-1s.th2.
Digging deeper into the .th file
M19.th : this file contains the centreline data from our cave, from survey station to survey station, splay legs, date of exploration, exploration and survey team, etc...
A short example:
survey M19 -title "M19"
    # Description
    # triple shakehole filled with snow near M17, on the Migovec Plateau

...

endsuvey
Let's pick apart the following few lines
centreline
    date 2018.07.31
    # team "Tanguy Racine" "Celia Tinsley" "Louise Ranken"
    units length meters
    units compass clino degrees
    data normal from to length compass clino
...
endcentreline
These indicate the date the survey was conducted, who by and sets a few default settings for the cave; lengths are expressed in metres, and angles in degrees.
The following line data normal from to length compass clino defines how the therion compiler should read the data which comes after.
Here is an example splay leg: 0 . 0.49 121.9 -0.7, which would read from 0 to .(a temporary unnamed station), length 0.49m, azimuth of 121.9°, inclination of -0.7°.
And another example of a survey leg
extend right
0 1 2.70 327.1 -13.8
You will notice the extend right command placed before the survey leg which controls the extended (unfolded) elevation display. This will be important later.
Digging deeper into the .th2 files
In the folder, you will find M19-1p.th2,M19-1s.th2: these are the files we can modify either directly with a text editor or through Xtherion's graphical interface. It contains information about the drawings around the centreline.
Opening the text editor, we find the following lines:
##XTHERION## xth_me_area_adjust -948.1 -1438.1 2447.7 6484.9
##XTHERION## xth_me_area_zoom_to 25

# 2018.10.06 created by TopoDroid v. 4.1.0c

#P  u:user label air-draught anchor blocks clay continuation debris entrance flowstone gradient pillar sand section soda-straw stalactite stalagmite u:water_drip water-flow
#L  u:user wall arrow border chimney pit rock-border section slope wall:blocks wall:ice
#A  u:user water blocks clay debris ice sand snow
These lines contain a summary of the drawing options (point, line and area palettes for instance) selected during the survey.
Next comes the important bit:
scrap M19-1p -projection plan -scale [0 0 100 0 0 0 1 0 m]
...
endscrap
These define the scope of a scrap, a small bit of drawing if you will. The scrap is M19-1p, assigned a 'plan' projection and a scale.
Within the scrap, we will find the following objects:
line rock-border -close on
429.01 -493.78
346.91 -524.94
429.01 -493.78
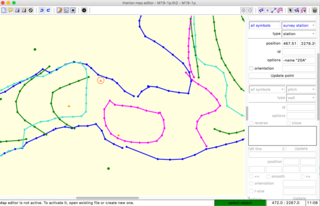
endlineWhich defines a triangular block by the local coordinates of its vertices. We will also find (at the very end of the file) survey stations with local coordinates, for instance
point 500.00 -600.00 station -name "0"
point 357.48 -379.99 station -name "1"
point 321.30 -371.99 station -name "2"
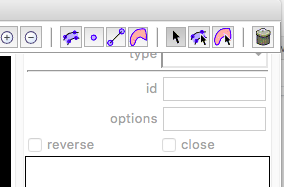
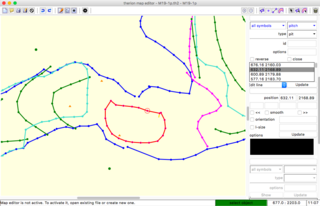
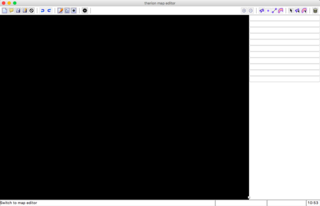
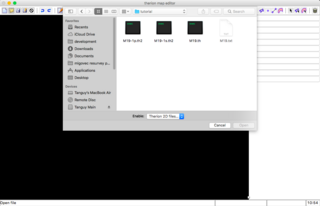
point 89.77 -472.55 station -name "3"All points, areas, lines are defined in the local coordinate system of the scrap. Now let's look at the file in Xtherion GUI. For instance, open Xtherion, navigate to the map editor view and select M19-1p.th2 from the tutorial folder and open, as below.
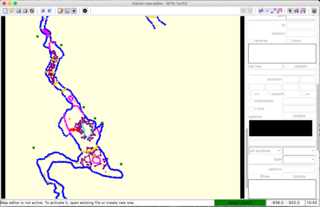
We can see there that different lines (walls, borders, rocks) are already drawn in different colours. It is possible to select objects to interrogate their attributes. The object is highlighted in red when selected as below.